
How to Root Xperia Ray ST18i ICS 4.0.4 (4.1.B.0.587)
This post contains how to root Xperia Ray ST18i ICS 4.0.4 (4.1.B.587) with the use of DooMLoRD Toolkit.
Instructions
Flash the Kernel of 4.1.A.0.562
- Download the Kernel - Go to Following Link
- Download the Flash-Tool and Install (If you have not install flash-Tool drivers first you have to install it - \FlashTool\drivers\ FlashTool-drivers.exe )
- Then, put ST18i_4.1.A.0.562_kernel.ftf (Downloaded in 1) into the \FlashTool\Firmwares
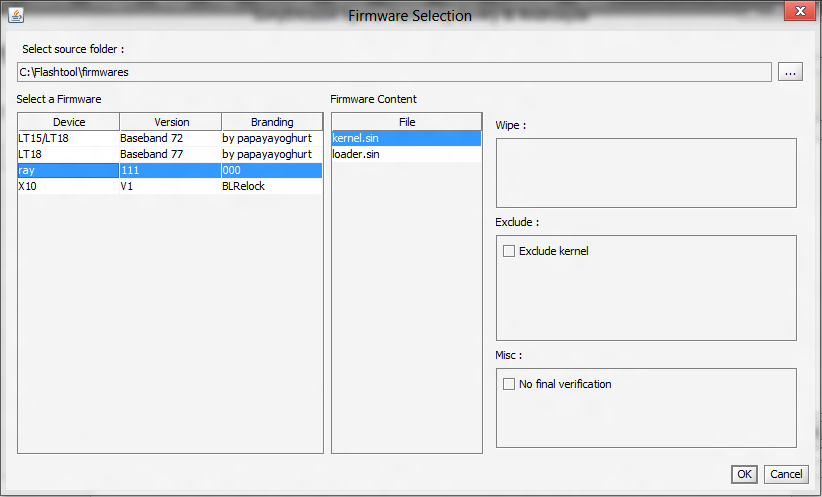
- Then open FlashTool.exe, Click on the Flash Button and select Flash Mode.
- Select Ray and Press OK.
- Then follow the instruction give by the software to connect the phone to the PC.
- Then you have to connect the device to PC (Make sure that device is switched off [remove battery may be]. First Plug the cable to the device and then plug USB to the PC while press and hold volume down key) (If the device connected correctly, a green led will show up)
- After finishing flashing kernel, disconnect the cable and restart the Device. (You might get some errors after rebooting, it is normal, and it will be fixed after next step.
Root your device with DooMLoRD’s Tool – Go to Following Link
Re flash the kernel (4.1.B.0.587)
- Download the Kernel - Go to Following Link
- Now flash the kernel by Follow 3 to 6 in the 1st step.
Warning
- For Windows only
- Root your device at your own risk
- First, read well and then follow instruction as it is.
Pre Requirements
- Latest Flash-Tool Software - Download Link Here
Instructions
- Flash the Kernel of 4.1.A.0.562
- Download the Kernel - Click Here
- Download the Flash-Tool and Install (If you have not install flash-Tool drivers first you have to install it - \FlashTool\drivers\FlashTool-drivers.exe )
- Then, put ST18i_4.1.A.0.562_kernel.ftf (Downloaded in 1) into the \FlashTool\Firmwares
- Then open FlashTool.exe, Click on the Flash Button and select Flash Mode.
- Select Ray and Press OK.
- Then follow the instruction give by the software to connect the phone to the PC.
- Then you have to connect the device to PC (Make sure that device is switched off [remove battery may be]. First Plug the cable to the device and then plug USB to the PC while press and hold volume down key) (If the device connected correctly, a green led will show up)
- After finishing flashing kernel, disconnect the cable and restart the Device. (You might get some errors after rebooting, it is normal, and it will be fixed after next step.

- Download the Kernel – Click Here
- Now flash the kernel by Follow 3 to 6 in the 1st step.
Or for other way you can do follow this video
and http://developer.android.com/sdk/index.html
Source: winandtips


