• CES
  • AMARTS
  • Electronic Kid
  • Useful-news
  • Forum
  • Fellowship
  • E-Library
  • All

Archives

gravatar

Update AT&T Galaxy S3 SGH-I747 to Android 4.2.2 AOKP Build 4 Jelly Bean Custom Firmware

AT&T Galaxy S3 SGH-I747 can be now updated to Android 4.2.2 AOKP Build 4 custom ROM. AOKP firmwares have always been very stable and fast in performance for almost every Android device they official support. ClockworkMod recovery is required for you to install this ROM. The best part is, AOKP Build 4 contains all the features that have been added in previous builds. You can update AT&T Galaxy S3 SGH-I747 to Android 4.2.2 AOKP Build 4 Jelly Bean custom firmware using the tutorial below.
As you continue reading below, we will guide you through the entire process of how to install Android 4.2.2 AOKP Build 4 Jelly Bean ROM on AT&T Galaxy S3 SGH-I747 with complete steps. Don’t forget to read the additional tips that you have to keep in mind before proceeding to the tutorial on the next page. Please make sure you backup all your data as given below because this tutorial will wipe your data. Let’s get to the tutorial now.

AT&T Galaxy S III SGH-I747 - Android 4.2.2 AOKP Build 4 Jelly Bean
Disclaimer: All the custom ROMs and firmwares, official software updates, tools, mods or anything mentioned in the tutorial belong to their respective owners/developers. We (TeamAndroid.com) or the developers are not to be held responsible if you damage or brick your device. We don’t have you on gun point to try out this tutorial ;-)

Android 4.2.2 AOKP Build 4 Jelly Bean Firmware Details:

The latest build of AOKP Android 4.2.2 ROM is not about new features, but the team has managed to successfully merge the previous AOKP code with the new Android 4.2.2 and the best part is, nothing seems to be broken. A stable AOKP ROM is what we need on Android devices.
Remember, this is not an official firmware update. This is a custom ROM, based on AOSP release of the Android 4.2.2 Jelly Bean.
UPDATE: Android 4.2.2 based LiquidSmooth custom ROM is now also available for this phone. Read the tutorial here!

AT&T Galaxy S3 USB Drivers

You will need to connect your Android phone with the computer. For that, please make sure you have installed the USB drivers for AT&T Galaxy S3 properly. If not, you can download the latest official drivers from our Android USB Drivers section here:

Backup and Other Important Tips

Done with the USB drivers? Perfect. The tutorial is on the next page, but first, please take a look at the following tips and important points you need to take care of. These are important, as we don’t want anyone losing their personal data or apps:
Always backup your important data that you might need after you install a new custom ROM, an official software update or anything else. Make a backup for just in case, you never know when anything might go wrong. See below for some tips on how to backup data:
Samsung users can also back up data using Samsung KIES. If you backup data manually, you get more options what to choose from and it is very easy to move data across Android devices from different manufacturers, i.e moving Samsung Galaxy Note backup data to HTC One X.
If you already have a custom recovery (ClockworkMod, TWRP etc.) installed on your phone, we strongly recommend a backup using that as it creates a complete image of your existing phone set up.
A few more optional tips that you should remember:
1. Having problems connecting your Android phone to the computer? You need to enable USB debugging mode. See here: How to Enable USB Debugging — for Gingerbread, Ice Cream Sandwich and Jelly Bean.
2. Make sure your Android device is charged up to 80-85% battery level. This might help you: How to Check Battery Percentage. Why? Because, if your phone goes off suddenly while installing a custom ROM, flashing an official firmware update or installing mods etc. — your phone might get bricked or go dead permanently. No one wants that, right?
4. Most of the tutorials and how-to guides on Team Android are for factory unlocked Android phones and tablets. We recommend NOT to try our guides if your phone is locked to a carrier, unless we have specified the carrier name or device model.

Source:  teamandroid

gravatar

How to Install LG Optimus 2X P990 to Android 4.2.2 CM10.1 Nightly Jelly Bean Custom Firmware

LG Optimus 2X P990 Android 4.2.2 CM10.1 custom ROM is now avaialble as an experimental / nightly firmware that you can try on your phone. There might be some bugs in this ROM, but still recommend you to give it a try and experience what Android 4.2.2 Jelly Bean has in store for you. Please note, this is a custom ROM, not an official update by LG. You can install Android 4.2.2 CM10.1 Nightly Jelly Bean on Optimus 2X P990 using our tutorial below. You need to have a custom ClockworkMod recovery installed and your phone should be rooted.
In this tutorial, we will guide you how to update Optimus 2X P990 to Android 4.2.2 CM10.1 Nightly Jelly Bean ROM with complete steps. Don’t forget to read all the important tips given below that you have to keep in mind before proceeding to the tutorial on the next page. Make sure you also backup all your data as given since you will have to wipe everything on your phone. Let’s continue with the tutorial below.

Android 4.2.2 CM10.1 Nightly Jelly Bean
Disclaimer: All the custom ROMs and firmwares, official software updates, tools, mods or anything mentioned in the tutorial belong to their respective owners/developers. We (TeamAndroid.com) or the developers are not to be held responsible if you damage or brick your device. We don’t have you on gun point to try out this tutorial ;-)

Android 4.2.2 CM10.1 Nightly Jelly Bean ROM Details:

NOTE: Since this is a nightly build, make sure you know that after installing this firmware update, your Android device can get FC errors, boot loops, several other bugs, apps might not work or worse, your phone might not boot. To fix, you will have to reinstall stock firmware or any other stable custom ROM.

LG Optimus 2X USB Drivers

You will need to connect your Android phone with the computer. For that, please make sure you have installed the USB drivers for LG Optimus 2X properly. If not, you can download the latest official drivers from our Android USB Drivers section here:

Backup and Other Important Tips

Done with the USB drivers? Perfect. The tutorial is on the next page, but first, please take a look at the following tips and important points you need to take care of. These are important, as we don’t want anyone losing their personal data or apps:
Always backup your important data that you might need after you install a new custom ROM, an official software update or anything else. Make a backup for just in case, you never know when anything might go wrong. See below for some tips on how to backup data:
If you already have a custom recovery (ClockworkMod, TWRP etc.) installed on your phone, we strongly recommend a backup using that as it creates a complete image of your existing phone set up.
A few more optional tips that you should remember:
1. Having problems connecting your Android phone to the computer? You need to enable USB debugging mode. See here: How to Enable USB Debugging — for Gingerbread, Ice Cream Sandwich and Jelly Bean.
2. Make sure your Android device is charged up to 80-85% battery level. This might help you: How to Check Battery Percentage. Why? Because, if your phone goes off suddenly while installing a custom ROM, flashing an official firmware update or installing mods etc. — your phone might get bricked or go dead permanently. No one wants that, right?
Source :  teamandroid

gravatar

How to Root Xperia Ray ST18i ICS 4.0.4 (4.1.B.0.587)

This post contains how to root Xperia Ray ST18i ICS 4.0.4 (4.1.B.587) with the use of DooMLoRD Toolkit.

Instructions
Flash the Kernel of 4.1.A.0.562

  • Download the Kernel - Go to Following Link
  • Download the Flash-Tool and Install (If you have not install flash-Tool drivers first you have to install it - \FlashTool\drivers\ FlashTool-drivers.exe )
  • Then, put ST18i_4.1.A.0.562_kernel.ftf (Downloaded in 1) into the \FlashTool\Firmwares
  • Then open FlashTool.exe, Click on the Flash Button and select Flash Mode.
  • Select Ray and Press OK.
  • Then follow the instruction give by the software to connect the phone to the PC.
  • Then you have to connect the device to PC (Make sure that device is switched off [remove battery may be]. First Plug the cable to the device and then plug USB to the PC while press and hold volume down key) (If the device connected correctly, a green led will show up)
  • After finishing flashing kernel, disconnect the cable and restart the Device. (You might get some errors after rebooting, it is normal, and it will be fixed after next step.

Root your device with DooMLoRD’s Tool – Go to Following Link

Re flash the kernel (4.1.B.0.587)
  • Download the Kernel - Go to Following Link
  • Now flash the kernel by Follow 3 to 6 in the 1st step.
Warning
  • For Windows only
  • Root your device at your own risk
  • First, read well and then follow instruction as it is.


Pre Requirements


Instructions
  • Flash the Kernel of 4.1.A.0.562
    • Download the Kernel - Click Here
    • Download the Flash-Tool and Install (If you have not install flash-Tool drivers first you have to install it - \FlashTool\drivers\FlashTool-drivers.exe )
    • Then, put ST18i_4.1.A.0.562_kernel.ftf (Downloaded in 1) into the \FlashTool\Firmwares
    • Then open FlashTool.exe, Click on the Flash Button and select Flash Mode.
    • Select Ray and Press OK.
    • Then follow the instruction give by the software to connect the phone to the PC.
    • Then you have to connect the device to PC (Make sure that device is switched off [remove battery may be]. First Plug the cable to the device and then plug USB to the PC while press and hold volume down key) (If the device connected correctly, a green led will show up)
    • After finishing flashing kernel, disconnect the cable and restart the Device. (You might get some errors after rebooting, it is normal, and it will be fixed after next step.


  • Root your device with DooMLoRD’s Tool – More Click Here
  • Re flash the kernel (4.1.B.0.587)

    • Download the Kernel – Click Here
    • Now flash the kernel by Follow 3 to 6 in the 1st step.

     Or for other way  you can do follow this video  


     here is the tool that in video used http://www.mediafire.com/?3wj6wlji2t9e604
    and http://developer.android.com/sdk/index.html
    Source: winandtips

    gravatar

    Samsung Galaxy S II (AT&T) SGH-I777: Install I777UCLCK3 Android 4.0.4 ICS Update

    Here's how to manaully install the official Android 4.0.4 Ice Cream Sandwich released for Samsung Galaxy S2 SGH-I777. This guide has been useful if you can't get the update thru Kies or OTA, for some reasons if your device is already rooted or installed with unoofficial firmware.


    Thus, who aren't touch their devices like rooting and may only update via Kies. You can follow the official support page from Samsung on how to get this update http://www.samsung.com/us/support/SupportOwnersFAQ


    Manually Update using the original stock ROM I777UCLCK3
    Just grab the neceessary files below and read the simple step by step procedure.
    - Makes sure the battery is fully charge
    - Back-up all important files stored from the device


    Odin Flasher Odin3_v1.85

    USB Driver: Download

    Stock ROM: SGH-I777_ATT_ I777UCLK3_I777ATTLK3 Download

    • Extract or unzip the contents of the zip file in your computer or laptop
    • Run Odin 
    • Now Enter the device into Download Mode:
      With the phone powered off, plug in the usb cable while holding the vol up + vol down buttons (but not the power button). 
    • When the warning screen appears, press Volume up to continue into download mode. 
    • In Odin, the small edit box in the upper left corner will turn yellow, and say something like [0:COM8]. The number could be different. 
    • Click on PDA button the load the I777UCLK3_I777ATTLK3_I777UCLK3_HOME.tar.md5
    • Click Odin's "Start" button. 
    • Watch the progress bar advance in green while the message box in the lower area describes the steps. 
    • When the flash is finished, the top left larger edit box will turn green and say PASS! and your phone will automatically reboot. 
    • Unplug the usb cable from you phone after it boots up. 
    • Success. You're Bone Stock.
      If your phone enters a bootloop, enter into recovery mode and perform a wipe data/factory reset. 

    Source: droidangel

    gravatar

    How to install Samsung Galaxy


    CyanogenMod 10.1 ( CM 10.1) is a AOSP based aftermarket firmware. It comes without the Google and Samsung applications and services (service apps). But you can install Google apps and services (apps) using Gapps zip file. But it includes all the Android 4.2.2 features.
    This CM10.1 ROM installation wipes all the user data on your phone internal memory. But it’s not touch your SD card. Make sure that you have a latest backup. This ROM developed by the XDA developer temasek.
    Warning!
    Installing custom firmware voids the Galaxy S3 warranty. If your phone brick or malfunction by following this tutorial, I can’t claim its damages. Applying this tutorial at your own risk. This post contains SGS3 custom ROM only for the Samsung Galaxy S III I9300 (International version), applying it to another device it will cause unexpected results.

    Requirements.

    Download.


    How to install Samsung Galaxy S3 GT-I9300 Android 4.2.2 CyanogenMod 10.1 (CM10.1) Jelly bean custom ROM.


    • Copy the downloaded ROM and Gapps zip files to your SD card.
    • Power off the phone.
    • Boot into the recovery mode by pressing and holding “Volume Up, Home and Power buttons at the same time. When you see the Samsung bootlogo release the pressed keys.
    • Once you have in the CWM or any other custom recovery first make a complete current ROM backup. Navigate to “Backup and restore>backup”. It will take several minutes, when the backup completed go back to the main menu. Your files are saved on SD card “ClockworkMod” folder.
    • Next go to “wipe cache partition> Yes – Wipe cache”.
    • After that navigate to “wipe data/factory reset> Yes – Wipe data”.
    • Go to “Advanced>Wipe dalvik-cache>Yes – Wipe cache”.
    • If you need a clean installation go to “mount and storage>mount /system”. After that “format/system”.
    • Now we can start the CM10.1 ROM installation. Go to “install zip from sdcard>Choose zip from sdcard” and select the downloaded ROM zip file.
    • To start the installation, select “Yes – Install”. This installation will take several minutes. Once it’s completed you are again in the Choose zip from sdcard menu again select that option and select the downloaded Gapps zip file.
    • After you have installed all the zip files select “reboot system now”. First boot takes few minutes.
    • Phone fully booted up, log-in to your Google account and download the require apps from Google play store.


    Source: androidgadgematic

    gravatar

    iPhone lockscreen can be bypassed with new iOS 6.1 trick

    ip.jpg

    A security flaw in Apple's iOS 6.1 lets anyone bypass your iPhone password lock and access your phone app, view or modify contacts, check your voicemail, and look through your photos (by attempting to add a photo to a contact). The method, as detailed by YouTube user videosdebarraquito, involves making (and immediately canceling) an emergency call and holding down the power button twice. We followed the steps and managed to access the phone app on two UK iPhone 5s running iOS 6.1. This isn't the first time this has happened — a very similar bug affected iOS 4.1, and was fixed in iOS 4.2. We've reached out to Apple for comment and will update you once we hear back.
    Update: Apple says it is aware of the issue and is currently working on a fix that will be deployed in a future software update.

    Via: theverge

    gravatar

    Root Galaxy Nexus on Android 4.1.1 JRO03C Official Firmware


    Google released the official Android 4.1.1 software update for its Nexus devices today. the latest build JRO03C offers much more stability, bug fixes and better Androidexperience than the previous stock version of Jelly Bean.
    In this tutorial, we will tell you how toroot Galaxy Nexus I9250 on Android 4.1.1 JRO03C OTA with complete steps on how to flash custom recovery on your phone. We will useClockworkMod recovery as our custom recovery and Superuser as our rootingpackage.
    Disclaimer: All the tools, mods or ROMs mentioned below belong to their respective owners/developers. We (TeamAndroid.com) or the developers are not to be held responsible if you damage or brick your device. We don’t have you on gun point to try out this tutorial ;-)
    Make sure you have installed all your USB drivers for the Samsung Galaxy Nexus to connect it with the computer. Download Samsung Galaxy Nexus USB drivers! Apart from just the USB drivers, there are a few more things that you need to take care of.
    1. You need to enable USB debugging mode. This helps to connect your Android phone with the PC. See here: How to Enable USB Debugging.
    2. Your phone battery should be 80-85% charged. If your phone goes off suddenly because of battery, during flashing ROMs or installing mods and updates — your phone might go dead permanently. See here: How to Check Battery Percentage.
    3. Backup all your important data that you might need as soon as your flash a new ROM, or make a backup for just in case, you never know when anything might go wrong. See below on how to backup data:
    4. Your phone should be factory unlocked. Additional instructions for locked Android devices will be added in the tutorial for unlocking devices.
    Now, let’s proceed with the tutorial on the next page and update your phone to the latest Android 4.1 custom ROM update.

    Root Android 4.1.1 JRO03C on Galaxy Nexus GT-I9250

    We have put together a detailed step-by-step instructions guide on how to rootAndroid 4.1.1 JRO03C Jelly Bean on Galaxy Nexus. Please read the complete tutorial once before actually performing it.
    Just To Remember:
    • This root method is only for Android 4.1.1 (JRO03C) installed on Galaxy Nexus (I9250, maguro) and I am not sure if it will work on the other variants of the Galaxy Nexus on other carriers.
    • Make a Nandroid backup of your previous phone set up before proceeding – for just in case anything goes wrong.
    Complete Step-By-Step Instructions:
    Step 1 - Download Android SDK from the Android Developers website and install. Also set it up with downloading platform-tools and USB drivers package in SDK.
    Step 2 - Enable USB Debugging mode in your Galaxy Nexus.
    Step 3 - Download Fastboot and extract it in android-sdk-windowsplatform-toolsdirectory. Create directory if not already there.
    NOTE: Skip Steps 1, 2, 3 if you already have them.
    Step 4 - Download Superuser 3.1.3 (Superuser-3.1.3-arm-signed.zip) for Galaxy Nexus on your PC, if you haven’t already.
    Step 5 - Connect and mount your Galaxy Nexus USB memory on your computer using the USB cable.
    Step 6 - Now copy/paste the Superuser-3.1.3-arm-signed.zip file to your SD card. Make sure the file is in the SD card root (not in any folder).
    Step 7 - Then turn off your phone.
    Step 8 - Download CWM 5.5.0.2 (recovery-clockwork-5.5.0.2-maguro.img) and save it to your android-sdk-windowsplatform-tools directory on your computer.
    Step 9 - Now go into Fastboot/Bootloader Mode on Galaxy Nexus. How? Press Volume Down + Power keys for a few seconds till you see some text on the screen. This is bootloader mode.
    Step 10 - Navigate to android-sdk-windowsplatform-tools directory and open Command Prompt (Shift + Right-click > Open Command Prompt).
    Step 11 - Type in the following command and press Enter.
    fastboot flash recovery recovery-clockwork-5.5.0.2-maguro.img
    Step 12 - Once completed, choose RECOVERY from the Fastboot menu and enter Recovery Mode.
    Step 13 - In ClockworkMod recovery, scroll down to “flash zip from SD card” and press the power button to select it.
    Step 14 - Press the power button again and select “choose zip from sdcard”.
    Step 15 -Now using your volume keys, navigate to Superuser-3.1.3-arm-signed.zipand select it using the power button. Confirm the installation on the next screen and the installation procedure should start now.
    Step 16 - After the installation completes, go to “+++++Go Back” and reboot the phone by selecting “reboot system now” from the recovery menu. The phone will boot now and it might take about 5 minutes to boot on your first time. So, please wait.
    That’s it! Your Galaxy Nexus is now rooted on Android 4.1.1 firmware installed onyour phone! Check for the Superuser app in your apps list to verify.
    To make sure you have correctly installed the above root method and it’s working,verify with Root Checker as given in the link.
    Have fun playing with it! If you have any issues, please fire them up in the comments below!
    If you’re still not interested in trying out Jelly Bean (Android 4.1) on your phone, try some alternatives:

    How to Fastboot with Android SDK


    Source: teamandroid


    gravatar

    WindowsAndroid 4.0.3 (x86/x64)

    WindowsAndroid 4.0.3 (x86/x64) | 64.9 MB

    Download Link :

    Mirror Link 1 :
    https://www.dropbox.com/s/w076731trvcrqkq/WindowsAndroid-403.rar

    WindowsAndroid is a useful application that was designed to emulate all the functions of Android and provide you with a means of enjoying all the features of this OS right onto your computer. This port of Android is based on Ice Cream Sandwich (ICS), the latest iteration of the well-known platform that runs on mobile phone, tablets and other devices. WindowsAndroid is a simple way to run Android operating system on Windows. It is actually a full porting of the mobile OS, which means that you will benefit from the full experience, complete with apps and specific settings.

    The emulator leverages the performance of the resources available for Windows, such as hardware acceleration and high performance media codecs. It makes Android 4.0.3 available and is able run on Windows Vista and up (Windows 8 included).

    A new version is currently under development and it should offer a newer Android. The advantage of WindowsAndroid is that it includes a complete experience, unlike other similar solutions that can run only Android apps on Windows. You can install the apps yourself if you have the APK by simply placing the file in WindowsAndroid’s “Data\App” folder.
    Source: experiainfotech

    gravatar

    Swimming-pool ships make waves in modular robotics

    Swimming-pool ships make waves in modular robotics  (w/ Video)
    University of Pennsylvania engineering Professor Mark Yim and his students in the Department of Mechanical Engineering and Applied Mechanics have been floating their robotic boats at the university pool after-hours as part of a Defense Advanced Research Projects Agency (DARPA) project. They have received funding from DARPA's Tactically Expandable Maritime Platform.
    The idea is for DARPA to draw upon the robotic boat project as research that can serve their goal of designing systems that move containers in agile ways, as linked-together boats to form islands, or to form bridges, or to serve as landing strips. The systems are for and other military purposes. According to DARPA, "The vision is to enable humanitarian assistance and disaster relief over broad coastal areas without dependence on local infrastructure, using unmodified commercial containerships, thus freeing military ships to carry out other military missions."
    Prof. Yim said DARPA wants eventually to scale this system up to size, envisioning their being able to jump off the boat and form a variety of instantly formed structures. The students, in designing their , are doing a scaled-down model of what DARPA intends to do.

    The team has been renting out the pool several nights a week and they conduct their experiments, with their robot swarms taking over the pool, into the early morning hours.
    The team built over 100 miniature "boats" out of laser-cut black plastic. As a video shows, the containers look like large shoe boxes. The containers are each named after a chemical element. The boats are controlled with Gumstix computers, which are Linux computers-on-modules. The computers tell the boats where to go.
    Yim and his students have written and manipulated code to get the boats to perform their tasks. When the assignment is to form an island, the boats move into place and hook together.
    Prof. Lim's research interests lie squarely in modular robots, which are machines made up of modules that can function alone or can be configured for a specific task. These types of robots are made up of identical active components that can be arranged to form numerous configurations—from snake to humanoid to centipede shapes. The systems can also self-reconfigure, depending on the called-upon task. Instead of sending ten different robots to do ten different things, notes Lim, one can have one robot that can do those ten things.

    Source : phys.org

    gravatar

    How to setup font Khmer Unicode in your phone !!!!

    You all need to ROOT your phone before you install font Khmer Unicode  i  knew you all knew how to ROOT your phone ready ask i show you in my post on web. so i show u all how to set font Khmer Unicode in your phone

     how to put font Khmer Unicode to any Android phones 

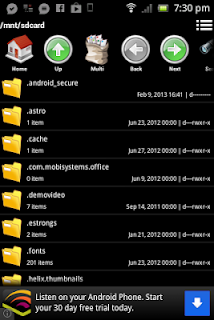
    1- you need to install File Manager
     
    2- you go setting of file Manager

      
    3- you need to check box  on Root Explorer and  Mount System Folder

    http://www8.pcmag.com/media/images/286205-file-manager-settings.jpg 

     4- you back to File Manager and copy Font Khmer Unicode that you have  in to your SDcard in to /system /font  them past it 
    here is for SamSung Font Khmer Unicode
     Font Khmer Unicode
     Font Khmer Unicode
    For SonyEricsson Xperia and JellyBean Font Khmer Unicode

    All full font khmer  unicode for any androids phones


    How to install  font Khmer Unicode with CWM mode

     1- You just copy  khmer Unicode in to ur SDcard then run CWM manager   to boot to recovery Mode   or reboot phone and press back key to go to CWM

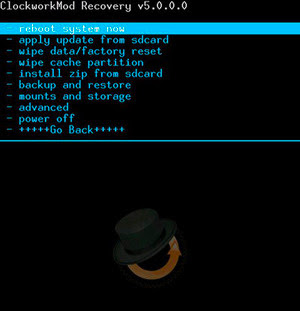
    2- get reboot in CWM then click back button till your phone show like below
    3- then you chose  install zip from sdcard
    4-  then choose Choose zip from internal sdcard.
    5- so you find ur zip file then choose YES
    6- after that you back to reboot ...till 
    7- if you want switch Keyboard pls use MultiLing Keyboard download from Google Play 
    8- enjoy

    Font khmer Unicode for  SonyEricsson Xperia Arc S (ICS 4.0.3)
    http://www.mediafire.com/?7rrqu83ystuhb3e

    NOTE: This Font Khmer Unicode not support all phone !!
    Warning : it may lost use your system !!!


    gravatar

    Eternal Legacy 3D


    Enter a huge world made of cinematic 3D environments in this intense role-playing game, a worthy heir of its Japanese predecessors. The absorbing story implies heavy responsibilities: as Astrian, you must save Algoad from destruction and restore the living bond between humans and nature. Enjoy dozens of hours of exploration and fighting in majestic landscapes. Talk to the people you meet, featuring full voice acting: they may join your team, reveal some secret, give you a quest, and more. The thrilling turn-based fighting system will bring you to the heart of action!

    Requirements:
    -Lg optimus 3D Max
    -3D capable custom rom or Stock Rom
    -800+ MB of free space in internal SD Card

    • The best, deepest Japanese role-playing game available on your 3D console.
    • Freely explore majestic regions, real-time rendered in full 3D, with free 360° camera.
    • A mix of fantasy and sci-fi: fight with swords or guns, face robots and magic, fly your own ship!
    • Play as Astrian and save Algoad from destruction in this intense quest, lasting dozens of hours.
    • Dynamic turn-based fights: preset your attacks, which will be triggered once the gauge is filled.
    • Choose the 3 fighters of your team among the 8 different characters you meet along the way.

    DOWNLOAD:  Eternal Legacy 3D

    gravatar

    Dead Space HD and 3D

    Dead Space HD/3D

    dead-space-android-phone-promo.png

    Dare to step into DEAD SPACE?

    The sci-fi horror masterpiece has finally arrived on Android. This stunning vision of the Dead Space franchise is truly a landmark in mobile gaming. Featuring hardcore gameplay and a rich audio experience, immerse yourself in bloodcurdling events that unleash the Necromorph horde. Can you survive one of the most gripping, bone-chilling sensory experiences on Android?
    Download:

    Dead Space HD/3D

    gravatar

    HowTo Root LG Optimus 3D Max by Eklovya

     http://www.gsmnation.com/blog/wp-content/uploads/2012/08/3D-Imaging-on-the-MAX.jpg
    Requirements:
    -LG Optimus 3D Max (p720, p725, SU870)
    -GingerBread Stock Rom
    -LG usb drivers installed
    -Windows Computer with UAC disabled

    1. Download the archive and unpack it (create a folder on desktop named O3DM rooting Kit):
    Root kit: http://www.mediafire.com/?fafrhfiu409zy99
    2.Download “IS11LG_SystemBackupTest.signed.apk” attached below and copy to root of your phone (internal storage).
    IS11LGSystemBackupTest: http://www.mediafire.com/?wej2995b0fw002j
    3. On the phone in the “Options -> Security” -> enable “Unknown sources”
    In the “For Developers” enable “Debug on USB”
    4. Now Install “IS11LG_SystemBackupTest.signed.apk”
    5. Then open the installed app  ”SystemBackupTest” and not closing
    Hold down the power button and reboot the device.
    6. Once LG logo show up, wait 150 seconds and PRESS Power Button one time, display will shut down
    7. Connect the usb now.
    8. In the folder you’ve created in your Windows Desktop «O3DM Rooting Kit» run the file «root.bat» as administrator,
    wait until the script is executed and the phone will reboot. Phone will load gingerbread.
    9.Then on the phone, open the Google Play Store and search for “SuperSu”.
    10. Upgrade “SuperSU”, and then, open the program asks updates … Click OK
    11.Update SU binary …
    10.Now you have a root-law. You can delete an application «SystemBackupTest»

    gravatar

    Samsung start making of Jelly Bean test firmwares for the Galaxy Ace 2

    Samsung is going to update the Galaxy Ace 2 in the near future but when? Today SamMobile received a couple of screenshots of a pre-release firmware for the GT-I8160 Galaxy Ace 2. The Galaxy Ace 2 is a good selling mid-range Android smartphone by Samsung and is expected to get an Android 4.1.2 Jelly Bean update around March / April. We think it is good to see Samsung started the Android 4.1.2 Jelly Bean for the Galaxy Ace 2. The Samsung Galaxy Ace 2 is not the only mid-range Android device to get Android 4.1.2. Earlier leaked out that Samsung will update the Galaxy Beam, Galaxy Music, Galaxy Chat, Galaxy Ace Plus and the Galaxy Mini 2 as well.  All android devices by Samsung will get the new TouchWiz Nature UX interface. Of course this will be a downgraded version of the Galaxy S III.
    Ace2JB1Ace2JB2


    source from:sammobile

    gravatar

    Epic Citadel Now Available For Android


                                       Now Epic Games as the developer carry applications that utilize the Unreal Engine 3 technology to the Android. Glance it looks the same as the iOS version, but apparently Android specifically granted additional features that benchmark. Players can choose between high performance and high quality modes to attain the best balance between visuals and speed. There’s also a resolution scaling option, which may be useful for high-res devices that lack the horsepower to push Epic Citadel at full resolution. Touch controls allow players to navigate around town, but there’s also a guided tour mode if you just want to admire the scenery, and a benchmark mode if you want to test your device’s mettle.
    Features :
    • Amazing visuals. “Epic Citadel” pushes the envelope for stunning visuals on Android devices. Through the latest advances in Unreal Engine 3 technology, the application delivers unrivaled graphics and special effects that immerse players in the kingdom’s grounds.
    • Benchmarking mode. “Epic Citadel” allows you to gather performance data for your Android device through benchmarking mode, which includes frames per second stats as well as quality settings and resolution.
    • Realistic reflections and animations. Environment mapping and other high-end rendering techniques produce lifelike reflections, and vertex deformation and skeletal animation bring trees and banners to life with dynamic movements.
    • Global illumination. Unreal Engine 3’s built-in global illumination system, Unreal Lightmass, provides realistic lighting and shadows with minimal development resources.
    • Dynamic specular lighting with texture masks. Sophisticated graphics features impart a tangible quality to cobblestone roads and vivid reflective marble surfaces, while lens flares and light coronas add dramatic emphasis when panning across light sources.
    With this new version you can experiment frame rates, quality settings, and detail resolution. Even for iOS version has also been given an update to support the larger resolution, but the benchmark still remains to features exclusive to Android. Epic games seems to understand what the word speed for android users.Unreal Engine 3 technology is not new in Android, and although the application is not diversified Epic Citadel game like Infinity Blade, but with it can be proven that developers Epic Games have taken their time to actually do their job to test a variety of devices such as owned Android. If You user wants to experiment how well the device can display the graphics, please download this application from the Android Market Store.
    Download here from Google Play Store.

    gravatar

    Sony Xperia TX Gets Update Android Jellybean On March


                                            Sony Mobile rumored to have confirmed that the Sony Xperia TX will soon get operating system updates Jelly Bean.But unfortunately TX Xperia users will have to wait another month to be able to enjoy the pleasure of Jelly Bean because this new update will be available next March.
    SonyMobile Blog Says :
    Hello everyone,
    We’d like to bring you up-to-speed with the latest in our Android 4.1 rollout scheduling. First up, the upgrade plans* for Xperia T, Xperia TX and Xperia V are progressing as planned – these smartphones will start to receive Jelly Bean during February and March.Next up, Xperia P, Xperia J and Xperia go will be upgraded from the end of March. Then Xperia S, Xperia SL, Xperia ion and Xperia acro S will follow in the subsequent weeks.
    Update Include Features Here :
    • Updated, more intuitive versions of Sony Media apps: WALKMAN, Album and Movies 
    • Increased options for personalization
    • Improved app organization and search 
    • Improved camera functionality 
    • Google Now 
    This update brings the latest version of the application itself WALKMAN, Albums and Movies; new launcher with 7 home screen, and a variety of other new features.As a reminder, other phones like the Sony Xperia P, Xperia and Xperia J will go get the update at the end of March. As for the Xperia S, SL Xperia, Xperia ion and Xperia acro S will get the update in April.

    Source :androidnice.com

    gravatar

    How to Root Galaxy S3 I9300 On Android 4.1.1 XXDLIH Firmware


      For those of you who need root privileges on the Galaxy S3 Jellybean running android 4.1 can now be done with this method.This root method tutorial is only for Samsung Galaxy S3 I9300. Please don’t try this on any other variants of the phone.
    Step How To Root :
    1. Download CF-Root-SGS3-v6.4.zip for Galaxy S3 to your computer and extract the zip file on this download file
    2. Download ODIN v1.85 which will help you to install Android 4.1.1 on Samsung Galaxy S3 I9300 Official Stockrom
    3. Enter on Download Mode ,Switch OFF your phone. Press and hold the Volume Down + Home buttons together, and then press the Power button till you see the construction Android robot and a triangle. Press Power again to confirm to enter into Download Mode
    4. Make Sure you must intalled Samsung Driver, You can Download Samsung kies for driver for windows.
    5.  Open ODIN on  computer. Connect your phone to your computer while your phone is in the Download Mode
    6.  If your phone is connected successfully, one of the ID:COM boxes will turn yellow with the COM port number
    7.  Now select the root package CF-Root-SGS3-v6.4.tar from extract in the zip file
    8. Click on ‘PDA’ and select the file CF-Root-SGS3-v6.4.tar
    9. Set Odin on Default,check the Auto Reboot and F. Reset Time options on odin. Do NOT touch any other options. Do with carefully
    10. Clickon Start button in ODIN. Installation process will start and would take a few minutes to complete and phone will be automatically reboot and unplug your phone from computer port
    11. Now after reboot you can see Superuser application,with this Root File your phone now automatically installed CWM

    gravatar

    How To Root i9100XWLS8 Android 4.1.2 Firmware on Galaxy S2


                                        Official Rom to update Galaxy S2 already available, a few days ago also rumored firmware has been able to do rooting. Rooting will allow you to install any custom recovery or ROM of your wish on the Samsung Galaxy S2 I9100.It itself is an powerful device but our hardworking and curious Android community always comes up with great custom ROM’s, roomates will the make your device more powerful and fast .Rooting Kernel for Galaxy S2 is already available for the device for easy access to root.
    How To Root :
    • Download Rooting Kernel for Galaxy S2 on your computer. Extract the zip package
    • Install Samsung Kies For Driver
    • Open the included Odin ,  Download ODIN v1.85
    • Turn off your device
    • Plug Your USB data Cable
    •  When the phone connects successfully, one of the ID: COM boxes will indicate yellow with the corresponding COM port number
    • Put your device into Download MODE (Home + Volume Down + Power)
    •  In ODIN, enable Auto Reboot and F. Reset Time options
    • Click PDA and select select “Siyah-s2-v6.0b4.tar file
    • Wait for the flashing of Rooting Kernel to complete, after it is done, Your Device Will be Reboot Automatically